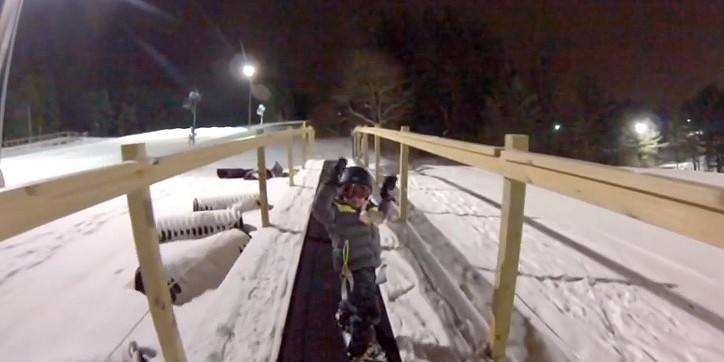
Most four year olds have the ability to enjoy and progress with snowboarding within a short amount of time. Although some may be tentative and nervous at first, with real hands on teaching, patience and encouragement they have a real chance of learning some if not all of the basics within a week. Given even more time, some 4 year old’s will have the ability to ride amazingly well.
General Guidelines
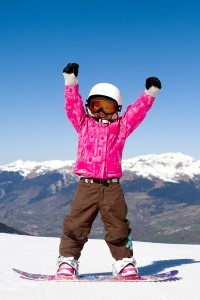 Although a lot of four year old’s seem to have boundless energy, most do have pretty short attention spans – bear this in mind when out on the snow with them. Keep sessions fun with a mix of games, playing in the snow and hot chocolate & snack breaks. Also try and mix up the sort of snowboarding you do with them. So anything from carving down a small slope holding their hands to building small mounds of snow for them to go over as little ‘jumps’ – keeping it FUN so they learn through play.
Find easy forgiving slopes to start on with easy access – eg.a beginner slope with a travelator or a rope tow – so you’re not pushing them up too many times!
Be hands on at first – keeping hold of them whilst they get used to the board, then let them practice ‘gliding’ on their own – between parents or from a gentle incline to flat ground.
Once they are feeling comfortable on the board you can use a harness for practicing on higher slopes.
Or, if you have one available, they could try out a Burton Riglet park. Even better if you can arrange a lesson with a Riglet Park snowboard instructor too (if available and if you can afford it!).
Four year old’s all differ hugely so remember to have a read of our Snowboarding Age 3 and our Snowboarding Age 5 sections to get more advice and information.
What to Expect
Expect that your four year old will have a very good chance of be able to ride down a very easy slope independently at the end of a week.
Expect, however, that after a week some may not have mastered both edges competently and some may not have completed many linked turns. But every child is different – so follow their lead.
Expect a variety of emotions from your child. Some may be planning how big they’re going to jump on their snowboards before they’ve even stood on the snow, whilst some may be making sure you’re going to hold their hands the whole time! Encourage and reassure them whatever their emotions.
Expect to have to prearrange any lessons – it’s recommended to use a snowboard school where possible. However, a lot of ski and/or snowboard schools won’t take 4 year old’s so if you’re keen to use one make sure check this out beforehand. (see our Snowboard School Guide for more details)
Expect some potential difficulty with finding small equipment.You should be able to source small kit in most bigger resorts but, again, it’s best to prearrange.
Expect some kids to excel fairly quickly and others to be ‘slow-burners’ when it comes to learning to ride. Again, time, patience and encouragement! They will get there!
How to – Practical advice and Tips
Pre-Snow
Get them used to the equipment if you can:
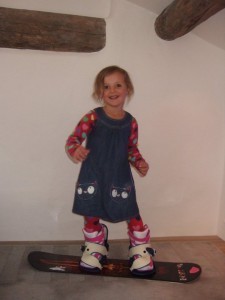
- Try on a snowboard, boots & bindings, helmet & goggles and all their winter clothing. This should get them excited too!
- Show them how to strap into their bindings and get them to practice
- Letting them stand and jump around on the board. Make sure it’s on carpet or grass or somewhere the board won’t get damaged or it’s edges damage surfaces, furniture etc!
- Definitely pull them around the carpet, lift them up on the board etc – getting them to enjoying ‘playing about’ on the board! Hopefully it will then feel more familiar when they try it on snow.
- Explain very basically, just as an introduction, what the basic parts of the board and bindings are – ie. nose, tail, heel & toe edges.
- Have the kids stand sideways and practice looking and pointing in the direction they want to go
- Keep it fun – don’t get bogged down with anything too technical!
First Time on Snow
Balance & First techniques
- If you are able to put your child into a lesson with an instructor trained in teaching very young children and with specific facilities (see our Snowboard Schools Guide) then that is generally the best way to go. However, availability, price, timing and child temperament means that this is not always a viable option. The following are a few techniques you can use to help teach your child or build on what they have already been taught:
- Initially you can start by just pulling them along (eg Riglet or holding hands) on the flat of the board so they get used to the feeling of the board. If you have the riglet system this is great for pulling them over little humps and bumps – most kids really enjoy this and it will get them used to the feel of the board and they’ll begin to learn board balance and correction skills.
- Then they can move onto riding and gliding on the flat of the board sideways between parents
- When the are confident with this you can hold their hands and walk them through some heel and toe turns – this will introduce them to edges and turning
- If you are confident in your riding you can also ride with your child – holding their hands/arms – going through heel and toe turns and even over small jumps, But only if you are a very confident rider and have a very tight hold! And you will have to lift/carry them over the jumps obviously.
- Keep things fun and full of games; ask them to be a teapot – trailing hand on hip and front ‘spout’ hand over the nose of the board – and to follow their spout down the slope looking to give people cups of tea! Or that they have a big bucket of water that they have to balance over the nose of their board etc. These sort of games help them keep sideways on the board.
- Try to work towards getting them to stop of their own accord. So ask them to follow their hand and pointing in the direction they’d like to go. This may not come for a while or with much control initially, so go at their pace and keep encouraging them.
- They can practice flipping themselves and their board over from sitting (facing down the slope) to getting up from their knees (facing up the slope). This is good for encouraging autonomy and for using toe edge. However, bear in mind this technique can be tiring for them and they will need a little help at first!
- From the start it is also a good idea to instill in them a few useful snowboarding and snow slope etiquette/rules. For example; always put your board bindings-side down when you put it on the ground; try and keep a hold on your board/bindings whilst strapping in; try and get to the sides of the slope if you need to stop; don’t stop in the middle etc. This sort of information may or may not go in, but it’s worth saying and then repeating even at a young age! (See our section on Safe Snowboarding for more info)
- If they are struggling on their toe edge (which is normal for young children) try holding their hands whilst they are on their toe edge and walking them through toe to heel turns. Eventually get them to try this on their own. It’s a good confidence builder when they are able to complete it independently. It’s also helpful for getting them up from the ground independently particularly as it can be harder to get up facing down the hill especially on lower gradient slopes.
- Remember that learning initially is really about the kids getting comfortable on their boards, not rapid progression.
- Also remember that they don’t need instruction all the time. With patience, mileage and time they will soon be ripping around on the snow!
- Check out our Age 4 Video section for clips of how other four year old’s and their families have got on!
More things to think about
What to wear?
Layers are best – good for keeping warm, easy to take off when they get hot. ‘Bibbed’ dungaree style snowboard pants and all-in-ones are brilliant – they keep the snow out and there’s always lots of bending and rolling about when kids and snowboarding are involved. Toilet stops can take a bit longer however!
Always make sure they have good, waterproof gloves. Kids ski gloves tend to have less waterproof covering on them as you have your hands on the snow a lot more when snowboarding than you do skiing, so be aware of how waterproof any gloves they have are.
Also a good warm helmet and goggles too. Keep sunglasses and a beanie handy for when they stop as they may want to take off their helmet & goggles. A cold child will most likely be a miserable child!
Other than a helmet, any extra body protection is up to you. At first, lots of bulky body armour is likely to impede their movement – so not ideal for learning. However as they get a lot better you may need to think about back protectors, knee & elbow pads, impact shorts and wrist guards. This is a personal choice and they will probably only need to be seriously kitted about when they are thinking about hitting boxes and jumps or if they are really seriously kamikaze!
Which Slopes?
Choose a very easy, quiet, safe slope with a very gentle incline. This doesn’t have to be a designated ‘beginner area’ at first; anywhere quiet, snowy (use caution or choose another day or slope if it’s icy) with a low gradient. After they get more comfortable on a slope, don’t be afraid to move to a onto something a little steeper if the first place you try has a particularly low incline as having a little bit of speed will definitely help them get a feel for the boards movement and ultimately initiate turns. Plus, if you choose to use a harness you can definitely step up to steeper stuff fairly quickly.
Advice on Lifts
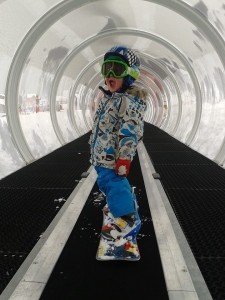 It’s great if you have access to an easy slope with a travelator, rope tow or even an easy chairlift – brilliant fun for the kids and less exhausting for Mum & Dad!
However, be aware that with a chairlift your little one will need to be lifted on and either carried or guided off – so make sure you are competent on chairlifts.
Button lifts make take some practice and are probably not for day one! You will have to gauge if the button lift is a good size, length and speed for your child; button lifts can be tricky at first for even hardened adult snowboarders! Thankfully beginner areas usually have easier, slower button lifts with good access should you need to rescue a fallen child!
On button lifts we found that if our daughters kept both feet strapped in, made sure they kept their trailing arm pointing down the slope and looked upwards to where they were going they had much more success. They loved the independence!
Every lift is different so use your judgement on what will work best.
Regular or Goofy?
Whether your child is regular or goofy – ie.if they lead with their left foot forward (regular) or the right (goofy) – may not be apparent straight away. Most kids boards are a twin tip design, meaning they can be ridden either way. So initially try one direction but don’t worry if they seem to favour the other foot or direction, because it’s a twin tip it should ride fine either way and you can change their set up accordingly later. Don’t be tempted to go really ‘duck footed’ (ie.both toes angled out) as this won’t be helpful with their balance.
You can try a couple of methods to ascertain which foot they will lead with; stand behind them and give them a tiny push or tell them to imagine running up to a skid patch and skidding; with both of these, the foot they put out first well be their leading foot – although obviously neither of these methods are foolproof!
Equipment
Other than appropriate winter clothing (see above), they will need a snowboard, snowboard boots, bindings, a snowboard helmet and goggles.
Depending on their height and weight, generally, a 4 year old would use between an 85 and 100cm child’s snowboard (or even up to a 105cm if heavier/larger than average). A board should be up to about chin or shoulder height. It is best to go for a smaller size for first board as it will be easy to turn/handle.
Try and source a newer, child-specific snowboard; they are a few different types – look out for any terms that mention making it much harder for the rider to catch edges, easier to turn, and all with a nice soft flex.
For bindings; small, one strap,child specific ones if possible. And appropriately sized boots. Try sourcing these before you hit the slopes because although more and more places stock small snowboard equipment it is still fairly limited to hire or buy – especially with boots!
(see our Equipment Guide Section for more info)
Aside from the basics there are also other bits of kit that you may find useful when going out on snow with your little ones:
Riglet Reels
Designed by Burton to fit with their kids boards from sizes 80 to 120cm, a Riglet Reel is a retractable leash that attaches to the front of the child’s board so that they can be pulled around or slowed down from behind by an adult whilst riding. They are an excellent idea and work superbly in conjunction with the Burton Riglet Parks. However, they may be harder to use outside of a contained beginner area.
(see our Riglet Reel and Riglet Park Videos in our Videos Section)
Harnesses
Using a harness to teach young children to snowboard (or ski for that matter) is quite a debated subject. Some people feel that they are dangerous out on the main slopes as other slope users may not see the leashes/cables/cords that attached rider to guider, so to speak. Or that they can hinder how a child learns to snowboard. I think that, used correctly, they can be an invaluable teaching tool for very young children.
Firstly, make sure you use a specific winter sports leash with a visible and not too long cable, make sure you are a competent snowboarder or skier if you are holding onto the leash. Once they have mastered standing up and sliding a little, using a harness will get them up and riding around with a bit of speed. Having extra speed with the safety net of the harness encourages kids to try turning, using edges, getting a feel for riding and getting about the slopes too! They can take a little getting used too – and infact there are quite a few different designs. Ones that come with handles front and back are ideal for picking the kids up from snow, lifting them on and off chairlifts and keeping a handle on them (quite literally!) whilst they ride the chairlifts!
I think that for 2, 3 and 4 year old’s harness can be brilliant for getting them up and running. As they get older than this you will probably find that they won’t need a harness to learn. Although if you have a nervous learner or a child wanting to keep up with older siblings, it may be very helpful at times! But try to keep it for a limited amount of time and focus on independent riding.
(see our Equipment Guide for info on Riglet Reels and Harnesses.)
We used a harness with both our daughters to brilliant effect. At age 3 our youngest rode from the top of the mountain to the bottom on the very first day of the season using a harness – being able to follow her older sister around the mountain and go up on the chairlifts really ignited her interest in snowboarding. She learnt edge control, turning, carving and jumping that winter all initially whilst riding attached to the harness (and a parent!). When we took off the harness she was used to riding with speed around the slopes and it wasn’t long before she was riding confidently and technically without the harness.
Technical Info Bit!
Kids have a different centre of gravity, head weight and muscle mass than adults so often when they learn to snowboard they do so a little differently.
When they start to learn to control a snowboard, don’t worry if they use use slightly different body positions to adults. For example, they may rely more on their heel edge and they may lean over their back foot more in order to find their balance and complete movements – this is all very normal for young children.
As children learn, grow and adapt, their riding will change, so don’t panic if they’re not stylin’ it initially – it won’t be long until they’re out riding you!
(See more in our ‘Technical Advice’ Section)


